
Most photo wall tutorials assume you have a drill, a set of frames, a laser level, and a weekend. Most people in India - especially those in PG rooms, hostel rooms, or rented flats - have none of those things and would prefer not to put holes in a landlord's walls.
The good news: you don't need any of that. The most visually striking photo walls on Instagram were made with polaroid prints, a roll of washi tape, and thirty minutes of arranging. This guide covers six DIY approaches that work in Indian rooms, with actual cost estimates and step-by-step execution.
For a complete picture of photo display options and room-by-room planning, start with the photo room decor guide. This post goes deep on the budget-first approach.

The Real Cost of a Photo Wall in India
Before getting into ideas, let's be clear about what things actually cost. Most "budget" decor guides list items without prices. Here's an honest breakdown:
| Item | Where to Get | Typical Cost |
|---|---|---|
| 10 polaroid prints | Memoriffy | ₹200-250 |
| 15 square prints (4x4) | Memoriffy | ₹300-350 |
| Washi tape roll | Local stationery shop | ₹30-60 |
| Command strips (10-pack) | Amazon/Flipkart | ₹150-200 |
| String lights (3m, warm white) | Amazon/local market | ₹150-300 |
| Corkboard (30x40cm) | Stationery shops | ₹100-200 |
| Wooden clothespins (pack) | Amazon/local market | ₹50-100 |
| Twine or jute rope (5m) | Stationery/craft shops | ₹20-40 |
The prints are the main cost. Everything else is optional - you need only one mounting method, not all of them. Most people spend ₹250-400 total for a wall that looks like they spent much more.
Six DIY Photo Wall Ideas That Actually Work
Idea 1: The Washi Tape Scatter (₹230-310)
The simplest and most forgiving approach. No planning required - the randomness IS the style.
What you need: 10-15 polaroid or square prints, 1-2 rolls of washi tape (patterned or solid - both work).
How to do it:
- Lay all your prints on the floor and roughly group them by tone (warm together, cool together, or by event).
- Start with one anchor print near the centre of your wall space at eye level. Tape it with a small X of washi tape at each corner.
- Add prints outward, varying orientation (some straight, some slightly tilted) and leaving 3-5cm gaps between them.
- Step back every few prints and check the overall shape - you want a loose organic cluster, not a rigid grid.
- Fill gaps with smaller prints or leave some open space - both look intentional.
What makes it work: Washi tape's slight transparency makes the mount nearly invisible. The tape itself becomes part of the design when you use a patterned variety. This approach is fully reversible - the tape peels off walls without damage.
Idea 2: String Light Display (₹400-550)
The most photographed DIY photo wall style. Works especially well in bedrooms.
What you need: 15-25 polaroid or small square prints, 3-5m of warm white string lights, wooden clothespins (or binder clips), 2 Command hooks or washi tape for anchoring the light string.
How to do it:
- Mount the string lights in horizontal rows across the wall, anchored at either end with Command hooks or looped around tacks. Space rows about 15-20cm apart.
- Clip photos to the light string using clothespins. Alternate photo orientation (portrait, landscape) and leave some spaces between photos.
- The bottom row can be lower density than the top rows - it creates a natural, hanging-down effect.
- Turn the lights on and view at night before finalising placement - the lit version looks very different from the daytime version.
Why it works: The lights add warm ambient glow that makes the photos look better than they would on their own. It's one of the few decor approaches that actively improves at night. The clothespins make it easy to swap photos in and out as you get new prints.

Idea 3: Tape Grid / Photo Grid (₹230-320)
Clean, modern, great for pastel and minimalist aesthetics. Requires the most upfront planning but looks the most polished.
What you need: 9, 12, or 16 square prints (same size throughout), washi tape or painter's tape, a ruler.
How to do it:
- Decide your grid: 3x3 (9 prints), 3x4 (12 prints), or 4x4 (16 prints). Measure the total space this will take and mark the top-left corner lightly with pencil.
- Tape the first print at the top-left. Use a ruler to ensure consistent spacing (2-3cm gaps work well for 4x4 prints).
- Work row by row, left to right, using a ruler to maintain even spacing. Check alignment every 3-4 prints by stepping back.
- The final grid should be perfectly rectangular even if the arrangement inside varies slightly.
Why it works: Grids are the most formal photo wall style - they signal intention and order. A perfect 4x4 grid of square prints in matching tones looks expensive regardless of how much it cost. The key is consistency: same format, same size, same spacing throughout.
Idea 4: Corkboard Photo Collage (₹350-560)
The most flexible format - add, remove, and rearrange photos anytime. Great for people who update their prints regularly.
What you need: A corkboard (30x40cm or 40x60cm from any stationery shop), thumbtacks or push pins, 8-15 polaroid or small square prints, optional: washi tape borders, small notes, dried flowers.
How to do it:
- Mount the corkboard using the hardware it comes with, or use heavy-duty Command strips on the back.
- Start with the largest or most important photos as anchors - pin them first, spread across the board.
- Fill in around the anchors with smaller photos, overlapping slightly at the edges. Some overlap is fine - it adds depth and texture.
- Add non-photo elements: a ticket stub, a small handwritten note, a pressed leaf, a washi tape border. These make the board feel personal rather than decorative.
Why it works: Corkboards are living objects - they evolve over time as your memories accumulate. The informal nature of pins means nothing is permanently placed. It's the most suitable approach for people who regularly get new prints and want to keep the wall feeling current.
Idea 5: Twine and Clips Horizontal Display (₹270-400)
A rustic, cottagecore-friendly approach. Works beautifully above a desk or study area.
What you need: 5m of jute twine or thin rope, wooden clothespins or binder clips, 2 Command hooks or two nails, 10-20 polaroid or square prints.
How to do it:
- Mount two Command hooks on the wall at the same height, 60-90cm apart.
- Tie the twine between the hooks, leaving a slight natural sag - perfectly taut looks forced; a little drape looks natural.
- If you want multiple rows, add hooks at consistent vertical intervals below the first pair.
- Clip photos to the twine, varying spacing slightly. Leave more space between the last photo and the wall end than between photos.
Why it works: The texture of jute or twine adds a natural, organic element that complements warm-toned photos. It's easier to execute than string lights (no electrical component) and works well in any room with adequate wall anchor points.
Idea 6: Door or Mirror Frame Display (₹200-270)
Uses existing room structures. No new holes or mounts required at all. Perfect for rented rooms.
What you need: 8-15 polaroid prints, washi tape or removable foam adhesive strips.
How to do it:
- Line the door frame with photos at regular intervals, starting from the top and working down both sides. Leave consistent gaps (about 5-8cm between photos).
- Alternatively, frame a large mirror - photos mounted around the mirror perimeter make the mirror look like an intentional centrepiece rather than a functional object.
- Use washi tape or removable adhesive - both peel cleanly from painted wood surfaces.
Why it works: This approach uses existing architectural elements rather than creating a new feature. The door frame or mirror does the structural work; the photos are layered on top. It's also surprisingly impact-heavy for the number of prints involved - 12 photos around a door frame creates a more dramatic effect than 12 photos scattered on a large wall.
Mounting Methods That Won't Damage Walls
For more detail on damage-free mounting, see the room decoration with photo prints guide. Here's a quick reference:
- Washi tape: Weakest hold, best for lightweight polaroids on smooth painted walls. Peels cleanly. Widely available in India from stationery shops and Meesho/Amazon.
- Double-sided foam tape (removable): Stronger than washi tape. Sold as "Magic tape" or "foam mounting tape" in stationery shops. Test on an inconspicuous spot first.
- Command strips (3M): Strongest damage-free option. Rated by weight - the small clear strips work for polaroids and 4x4 prints. Available on Amazon/Flipkart. Worth the cost if you're worried about your walls.
- Bulldog clips + tape: Mount the clip to the wall with tape; the clip holds the photo. The contact point is the clip, not the photo - easy to swap photos without removing the mount.
Making Budget Prints Look More Expensive
The difference between a ₹500 photo wall that looks ₹5,000 and one that looks ₹500 comes down to a few decisions:
Edit before printing. Apply a consistent filter or preset to all photos before printing. Warm them up together, convert some to black and white together, or adjust exposure to a consistent level. Consistency of edit creates cohesion even when the subjects are very different.
Choose a format and stick to it. Mixing polaroids, square prints, and 4x6 prints on the same wall looks cluttered. Pick one format. If you want variety, stick to two formats and keep one dominant (e.g., mostly polaroids with a few photo strips as accents).
Odd numbers cluster better. Groups of 3, 5, 7 photos look more dynamic than even numbers. When arranging a scatter or organic layout, aim for odd-numbered groupings.
Leave breathing room. The most common mistake is printing too many photos for the space. A wall with 12 well-spaced photos looks more considered than 25 photos crammed together. When in doubt, print fewer.
Lighting changes everything. Even a basic ₹150 string light positioned to illuminate the photo wall from the side or below transforms how the prints look in the evening. This is the highest return-on-investment addition to any budget photo wall.
Memoriffy's polaroid and square prints are designed for wall display - waterproof, matte finish, printed to last. Ships across India.
Order Prints from ₹20 Each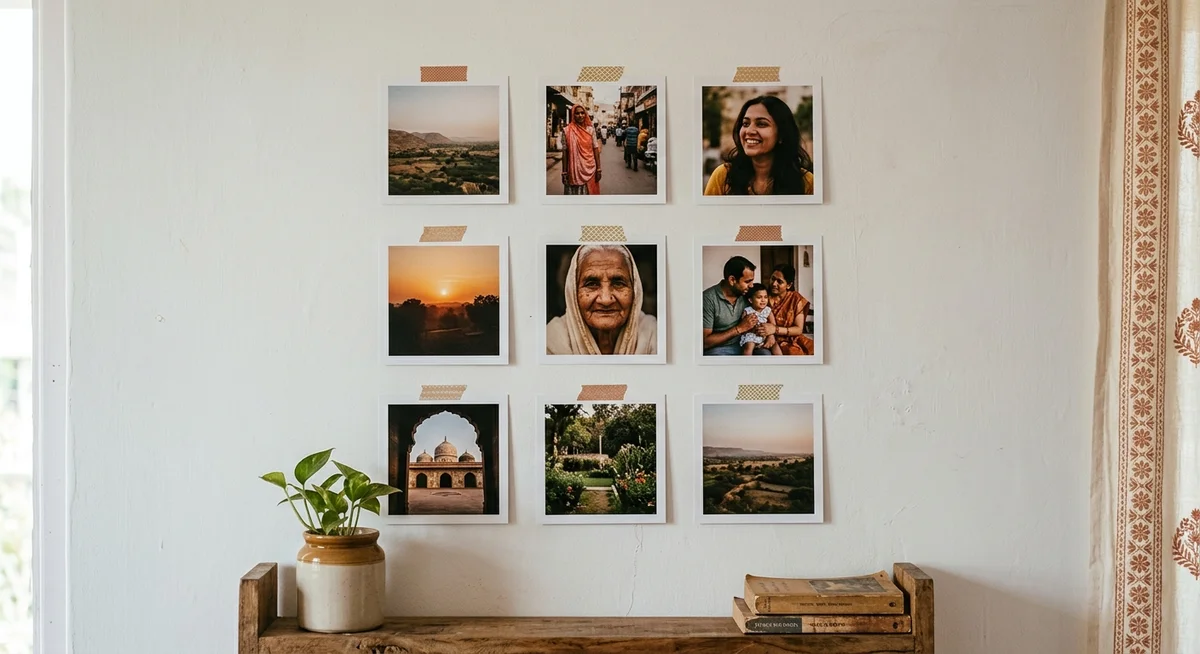
Common Budget Photo Wall Mistakes
Mistake 1: Printing first, planning second. The most expensive mistake. Order prints without knowing your wall space, format, or arrangement - and you'll either have too many, too few, or the wrong sizes. Measure your wall, sketch your layout (even a rough pencil sketch), then order.
Mistake 2: Using regular tape. Cellophane/Scotch tape leaves residue, yellows, and can damage photo surfaces or wall paint when removed. Only use tape designed for walls (washi tape, painter's tape) or purpose-made mounting strips.
Mistake 3: Printing low-resolution photos. A pixelated polaroid isn't a budget aesthetic - it just looks bad. Run the photo quality check (view at 100% zoom on a computer screen) before ordering. More on this in how to select the best photo for printing.
Mistake 4: Not testing the layout first. Cut paper rectangles in the same dimensions as your intended prints and tape them to the wall before the real prints arrive. This takes 20 minutes and saves the frustration of an arrangement that doesn't work once real prints are mounted.
Mistake 5: Overcomplicating it. The best budget photo walls have a simple concept executed well. A single string of 20 polaroids on a string light display, all in warm tones, all of people you love - beats a complex mixed-media collage every time.
Frequently Asked Questions
How do I make a photo wall without damaging the wall in a rented flat?
Use washi tape, Command strips (3M), or removable foam mounting tape. Washi tape is lightest (best for polaroids), Command strips are strongest (good for larger prints). Both peel off most painted Indian wall surfaces cleanly. Test a small piece in an inconspicuous area first - older distemper or textured finishes can sometimes peel with any adhesive.
What is the cheapest way to display photos on a wall?
Washi tape scatter: 10-15 polaroid prints (₹200-250) plus a washi tape roll (₹30-60) = roughly ₹250-310 total. This is the minimum viable photo wall - and looks great if you choose warm-toned photos and keep the arrangement organic rather than forced.
Can I use regular Scotch tape to mount photos?
No - regular transparent tape leaves adhesive residue that yellows over time, can damage the photo surface, and can take paint off walls when removed. Use washi tape, painter's tape, Command strips, or purpose-made removable mounting tape instead. These are all available in India from stationery shops and Amazon/Flipkart.
How many photos do I need for a photo wall?
For an average bedroom feature wall (roughly 1.5-2m wide): washi tape scatter or string light display needs 15-25 polaroids. A 3x3 grid needs 9 square prints. A corkboard (40x60cm) fits 8-12 prints with some overlap. Start with fewer than you think you need - you can always add more, but removing prints leaves visible marks or empty spaces.
Do I need to frame photos for a wall display?
No. Frameless polaroid and square print displays are a deliberate aesthetic choice - not a compromise. The most popular photo wall styles (VSCO, cottagecore, hostel-room aesthetic) are all frameless by design. Frames add cost, weight, and visual complexity. For large prints (A4+) or formal settings, frames make sense. For casual bedroom or study walls, go frameless.
Where can I get photo prints for a DIY wall in India?
Memoriffy prints polaroids, square prints (4x4), and photo strips on waterproof, matte-finish paper specifically suited for wall display. Prints ship across India. Order at memoriffy.com.