
A polaroid wall collage is what happens when a collection of personal photos becomes something you can look at every day without getting bored of it. The format works because polaroid prints are small enough to display in numbers - 15, 25, even 40 on a single wall - and the white border gives each photo its own breathing room without needing a frame. The result is warm, layered, and unmistakably personal. Part of the photo room decor guide, this page covers six specific collage layouts with photo counts, dimensions, and the small decisions that make each one work.
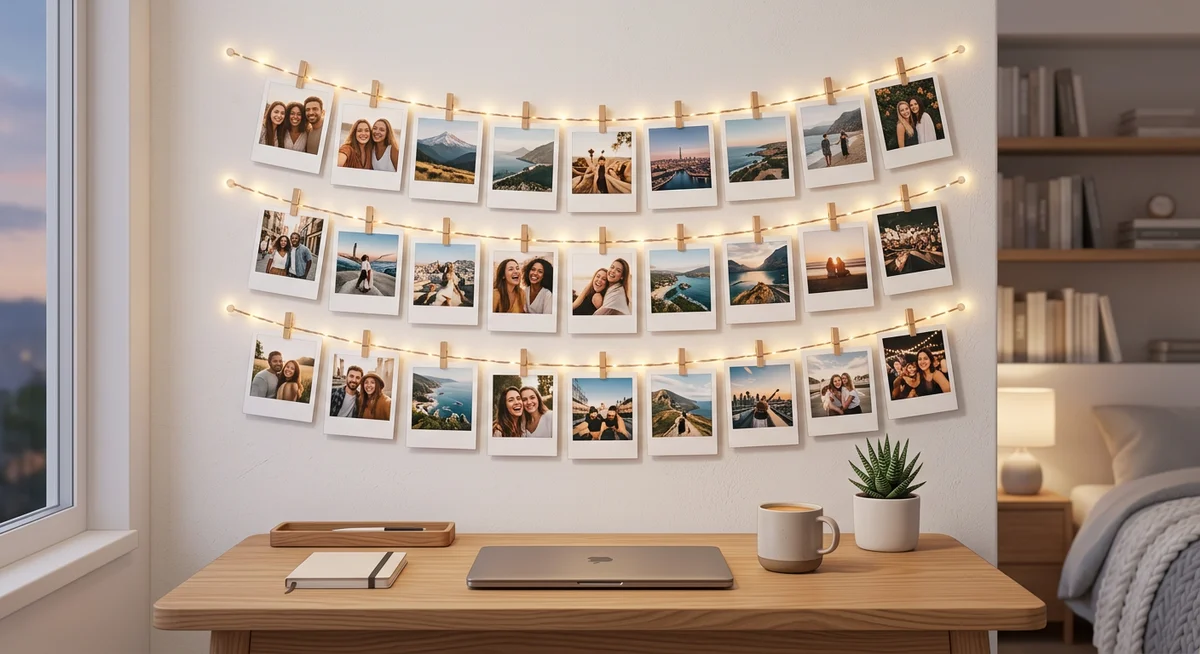
Layout 1 — The String Light Display (Most Popular)
Setup: 2-3 horizontal strings of fairy lights (warm white, not cool white) strung across the wall with a slight drape between attachment points. Clip 8-10 polaroids per string. Total: 20-30 polaroids across a wall section roughly 150-200cm wide.
What makes it work:
- Warm white bulbs (2700K-3000K). Cool white creates a clinical effect that fights the warmth of the photos. The warm glow makes skin tones in the photos look their best.
- Slight drape between attachment points, not pulled taut. The gentle curve gives the display movement and avoids the geometric rigidity of straight lines.
- Mix of photo orientations. Some polaroids flat, some angled 5-10 degrees clockwise or counterclockwise. The slight variation mimics the organic feel of photos spread on a table.
- Attach the lights at two points only - ideally at the top corners of the wall section using small removable hooks. No wall contact from the lights themselves in between.
Photo selection tip: For string light displays, choose photos where the main subject is centred. Polaroids hang from the top - if the subject is at the bottom of the frame, it gets cut off visually by the clip. Faces, couples, and tight compositions work best. Wide landscapes often get lost at this size.
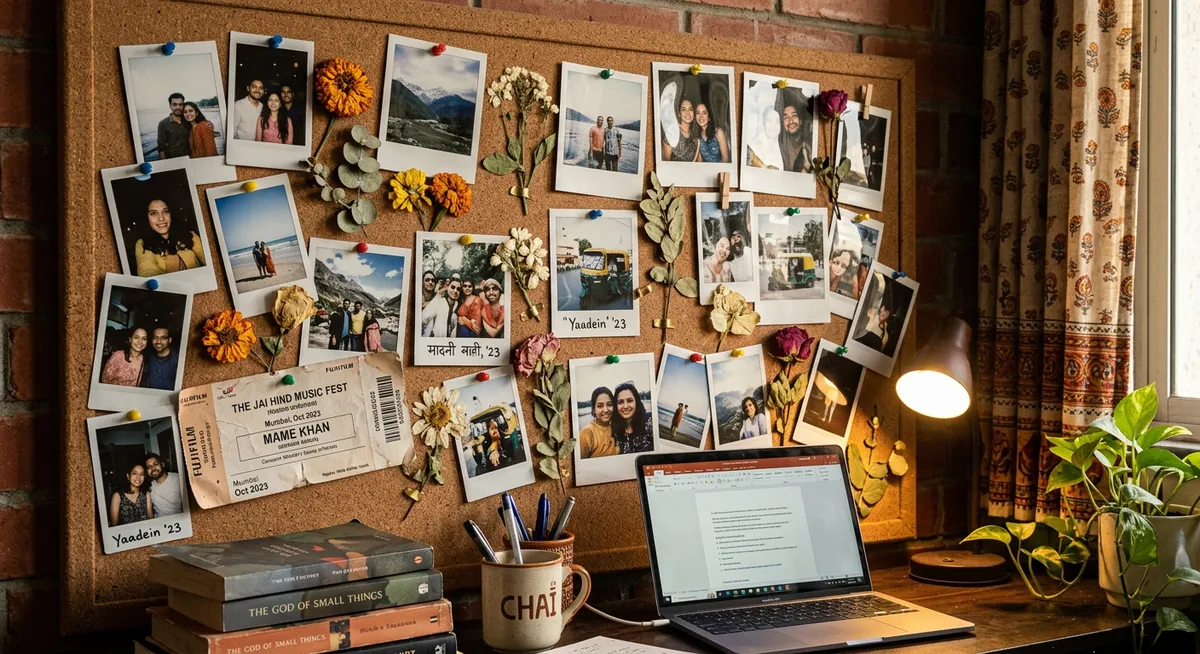
Layout 2 — The Corkboard Collage
A corkboard turns a polaroid collection into a living display - one you can add to and rearrange over time. This is particularly suited to desks and work areas where you want the display to evolve as life does.
Setup: A corkboard (60x90cm is a practical size - smaller feels sparse, larger requires a lot of commitment). Pin 20-40 polaroids in an organic arrangement with no strict grid. Add a few mementos alongside: a concert ticket, a sticky note, a dried flower, a small clipping. The mixed media keeps the board from feeling like a photo album displayed on a wall.
What makes it work:
- No symmetry. The organic arrangement is the point. Resist the impulse to make rows. Let photos overlap slightly at edges, place them at varied angles, leave some areas denser than others.
- Anchor photos. Start with 3-4 larger or more important photos placed first (not necessarily in the centre - asymmetry looks better). Build around them.
- Leave 30% of board empty. A full board looks crowded. Empty space gives the displayed photos room to breathe and you room to add new photos.
- The board itself can lean against the wall on a desk surface rather than being mounted. This preserves the wall and allows the board to be moved.
Layout 3 — The Tape Grid
A tape grid brings polaroids to the wall directly in a clean, structured arrangement. Unlike the organic corkboard, this is deliberate and orderly - the visual register is more curated, less spontaneous.
Setup: Choose a rectangular section of wall (120cm wide x 80cm tall is a common starting size). Mark the position of each polaroid lightly in pencil. Use two small pieces of washi tape per polaroid - one at the top left corner, one at the top right. The tape holds the print flat to the wall without covering the photo itself.
Common configurations:
- 4 columns x 3 rows (12 prints): Each polaroid at 8.9x10.8cm with 3cm spacing. Total display area: roughly 50x50cm. Compact and clean.
- 5 columns x 4 rows (20 prints): Needs a wider wall section (approximately 70cm wide). Works well above a full-width desk.
- Staggered grid: Alternate rows offset by half a polaroid width. Creates a brick-like pattern that's more dynamic than a straight grid while retaining the structure.
Wall colour matters here. A tape grid on a white wall looks intentionally minimal. The same grid on a patterned or dark wall competes with the photos. White, off-white, or very light walls work best for tape grid displays.
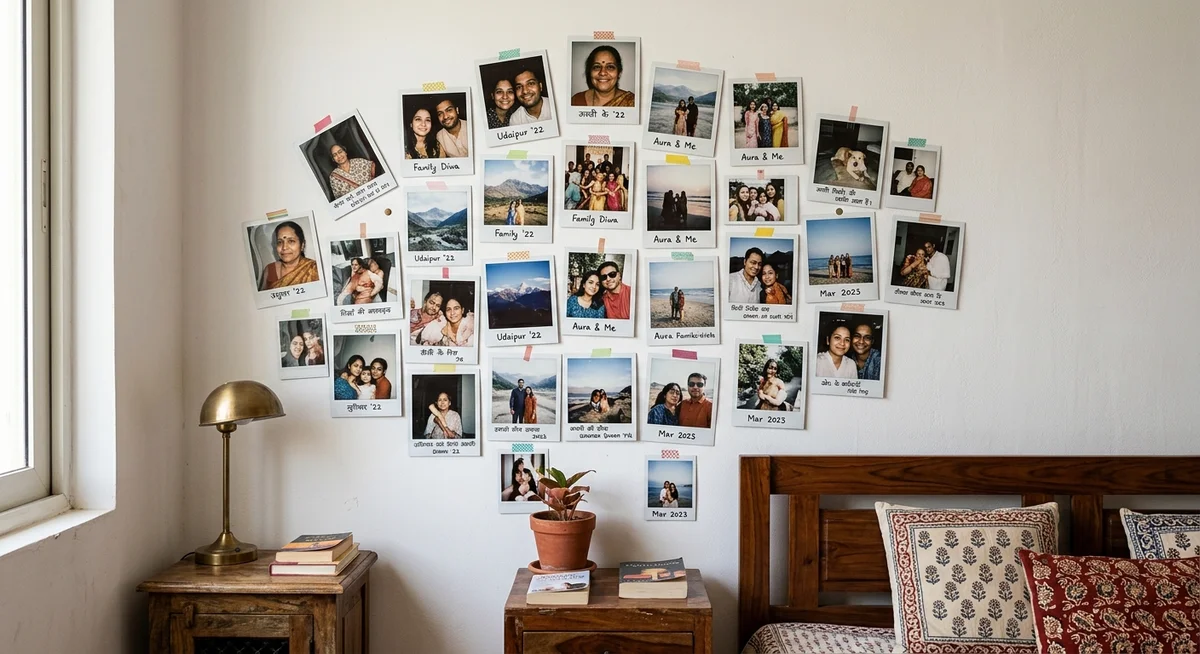
Layout 4 — The Organic Scatter
An organic scatter is the opposite of a grid: polaroids placed across a wall section at varying heights and angles, with no strict arrangement. The result looks like photos placed down spontaneously rather than curated.
Setup: Choose a wall section and a rough perimeter (don't let photos drift outside this area, or the scatter looks messy rather than organic). Place photos at varying heights within the perimeter, angling each one 5-20 degrees in either direction. Vary the spacing - some photos nearly touching, others with more space between. Step back and assess after every 5-6 photos.
This layout works best when:
- The photos themselves are casual - candid shots, party photos, group photos with people mid-laugh. The organic arrangement matches casual content. A scatter arrangement with formal posed portraits looks incongruous.
- The wall is a background, not a feature. An organic scatter works in a corner, around a door frame, or on a wall that isn't the primary focal point of the room.
- You have at least 20 prints. A scatter with fewer prints looks sparse. Density is part of what makes the scatter feel rich rather than random.
Layout 5 — The Framed Centrepiece With Polaroid Surround
This hybrid layout combines a single large framed print - a 5R or A4 timeless print - at the centre of the wall section, surrounded by polaroids arranged around it. The large print anchors the display; the polaroids give it scale and personality.
Setup: Mount the framed print first, centred on your chosen wall section. Place the polaroids around it in a roughly circular or rectangular orbit - 8-15 polaroids arranged 10-15cm from the frame edges. The polaroids can be mounted directly (removable strips) or displayed on a short string light arrangement running behind and around the main frame.
This is the arrangement most cited by interior design references for creating a gallery wall with visual hierarchy. The large print tells you where to look first. The polaroids reward you for looking longer.
Layout 6 — The Door and Mirror Frame Display
Not every polaroid display needs a wall section. Photo strips and polaroids both tape cleanly to the edges of mirrors, door frames, and wardrobe doors - creating an accent display that doesn't require any dedicated wall space.
Setup: Use washi tape to attach polaroids in a line down one side of a mirror frame or door frame. 6-10 polaroids in a single column, each one touching or slightly overlapping the next. On a wider mirror, run a line down both sides for a symmetrical frame effect.
This works especially well in small rooms and hostels where wall space is limited. The display is visible every time you walk past the door or use the mirror - high daily visibility in a small footprint.
Print Quality for Displayed Polaroids
Polaroids in a string light display or wall collage are at eye level, close viewing distance, often in warm ambient light. This combination rewards print quality - colour accuracy, paper weight, and the texture of the surface are all visible. According to Library of Congress preservation data, dye-based prints degrade within years under display conditions, especially in UV-exposed or humid environments. For a collage that stays on your wall for years, pigment-based prints with waterproof coating are the right choice - the initial investment prevents reprinting when the colours shift.
Frequently Asked Questions
How many polaroids do I need for a wall collage?
String light display: 20-30 polaroids. Corkboard collage: 20-40. Tape grid (4x3): 12. Tape grid (5x4): 20. Organic scatter: 20-35. Framed centrepiece surround: 8-15. The minimum to make any collage look intentional rather than sparse is about 12-15 prints.
How do I make a polaroid wall collage without nails?
String lights attach at only two points (small removable hooks at corners). Polaroids clip to lights without touching the wall. For direct wall display: washi tape at corners for lightweight polaroids, removable adhesive strips for slightly heavier prints. A corkboard on a desk or shelf doesn't touch the wall at all.
What photos work best for a polaroid wall collage?
Close-up faces, tight two-person shots, and high-contrast compositions work best at polaroid's small size. For string light displays, choose horizontal or square compositions - they hang flat from the clip. Avoid wide landscapes (too much detail lost at small size) and dark, low-contrast photos (hard to read on a warm-lit wall).
Which string lights are best for a polaroid display?
Warm white (2700K-3000K) fairy lights. Not LED strips (too bright, too even). Not cool white (too clinical). Fairy lights with small individual bulbs spaced 5-8cm apart give the most flattering glow. The light should complement the photos, not compete with them.
How long do polaroid wall displays last?
Pigment-based polaroids (like Memoriffy's) last 50-100+ years under normal display conditions. Dye-based polaroids from standard photo services show visible colour shift within 1-3 years, especially near any light source. For a collage you're putting effort into building, choose prints that will still look the same in three years.